

Melting Chocolate for Dipping: Tips, Methods, and Recipes
Chocolate, often considered a culinary delight, plays a crucial role in various dessert preparations, especially when it comes to dipping. Whether it’s a luscious fondue or a simple chocolate coating for fruits, the melting process can elevate the dish to a new level of indulgence. Understanding how to correctly melt chocolate not only enhances flavor but also ensures a smooth, glossy finish that’s perfect for dipping.
There are several types of chocolate available, each with its unique taste and melting characteristics. Dark chocolate, with its rich flavor profile, typically melts at a temperature range of 120 to 130 degrees Fahrenheit. Milk chocolate, sweeter and creamier, has a slightly lower melting point at around 110 to 120 degrees Fahrenheit. Meanwhile, white chocolate, made from cocoa butter rather than cocoa solids, melts at a comparable temperature of 100 to 110 degrees Fahrenheit. Knowing these temperatures is vital for achieving the ideal consistency for dipping.
This article aims to provide a comprehensive guide for melting chocolate for dipping, covering essential information from types of chocolate to the best methods and tips you need for success. Whether you are a novice in the kitchen or someone looking to refine your chocolate melting skills, this guide will help you create beautifully melted chocolate for all your dipping needs.

What You Need to Know Before Melting Chocolate
Before you begin melting chocolate for dipping, it’s essential to understand the different types of chocolate available, as they each have unique qualities that affect the melting process. Below are the three primary types of chocolate you may consider:
Types of Chocolate
- Dark Chocolate: Renowned for its rich and intense flavor, dark chocolate contains a higher percentage of cocoa solids and generally melts at a temperature ranging from 120 to 130 degrees Fahrenheit. Its robust profile makes it ideal for dipping fruits and nuts.
- Milk Chocolate: Sweeter and creamier than dark chocolate, milk chocolate contains milk solids and has a lower melting point of about 110 to 120 degrees Fahrenheit. It is often favored for its smoothness, making it perfect for lighter dippers such as marshmallows and pretzels.
- White Chocolate: Although technically not chocolate since it lacks cocoa solids, white chocolate is made from cocoa butter and has a mild flavor. It melts at a comparable temperature of 100 to 110 degrees Fahrenheit. Its creamy texture complements a variety of dippers.
Understanding these melting points is crucial for achieving the right consistency and flavor in your dipping chocolate.
Choosing the Right Equipment
To melt chocolate effectively, selecting the right equipment is just as important as the type of chocolate you choose. Here are the most common tools for melting chocolate:
- Double Boiler: This classic method involves placing a heatproof bowl over a pot of simmering water. The gentle steam melts the chocolate evenly without risk of scorching.
- Microwave: A convenient option, the microwave can melt chocolate in short bursts. It’s essential to stir the chocolate in between to ensure even melting and prevent burning.
- Chocolate Melting Pot: This specialized equipment is designed specifically for melting chocolate, maintaining a consistent temperature for a smooth melt. It’s a perfect choice for serious chocolate enthusiasts.

The Best Methods for Melting Chocolate
1. Melting Chocolate in a Double Boiler
Melting chocolate using a double boiler is a traditional and effective method. Follow these steps for success:
- Fill a pot with a few inches of water and bring it to a gentle simmer. Ensure the water does not touch the bottom of the heatproof bowl.
- Place chopped chocolate into the bowl and set it over the simmering pot. The steam will gently heat the bowl, melting the chocolate.
- Stir the chocolate continuously with a spatula to promote even melting and to avoid scorching.
- Once fully melted and smooth, remove the bowl from the heat.
To ensure the best results, keep the heat low and avoid letting any water or moisture come into contact with the chocolate, as this can cause it to seize.
2. Melting Chocolate in the Microwave
The microwave is a convenient method for melting chocolate, especially for small batches. Here’s how to do it:
- Place chopped chocolate in a microwave-safe bowl.
- Heat the chocolate in the microwave in 30-second intervals. After each interval, carefully stir the chocolate to allow the residual heat to continue melting it.
- Repeat the heating and stirring process until the chocolate is almost fully melted, then remove it from the microwave and stir until smooth.
Be cautious to use short bursts to prevent overheating. If you notice any chocolate clumping, it might be overheating; stop immediately to avoid burning.
3. Using a Chocolate Melting Pot
A chocolate melting pot is designed for melting chocolate efficiently and consistently. Here are some advantages and instructions for its use:
- Consistency: A melting pot maintains the ideal temperature for melting chocolate, ensuring a smooth texture throughout.
- Ease of Use: Simply add chopped chocolate, set the temperature, and allow it to melt while occasionally stirring.
- Safety: Most melting pots come with built-in controls to prevent overheating, reducing the risk of scorching.
For best results, follow the manufacturer’s instructions and avoid overfilling the pot to ensure even heating and minimize spills.
Tips and Tricks for Perfectly Melted Chocolate
Preventing Seizing
One common issue when melting chocolate is seizing, which can occur if moisture is introduced. Here are some tips to prevent this:
- Keep Equipment Dry: Ensure that bowls, spoons, and any other equipment are completely dry before use.
- Avoid Steam: When using a double boiler, make sure no steam escapes and condenses into the chocolate.
- Consider Using Couverture Chocolate: This type of chocolate is designed for melting and dipping as it has a higher cocoa butter content, making it less likely to seize.
Achieving the Right Consistency
The consistency of your melted chocolate is crucial for effective dipping. Here are some tips to ensure a smooth melt:
- Thinner Chocolate: If you desire a thinner chocolate for easier dipping, consider adding a small amount of vegetable oil or shortening to the melted chocolate.
- Temperature Control: Keep the chocolate warm in a melting pot or by setting it in a warm area while you prepare your dippers.
- Avoid Overheating: Be careful not to overheat the chocolate as it can become thick and difficult for dipping.
Common Issues When Melting Chocolate and Solutions
Chocolate Doesn’t Melt Smoothly
If your chocolate isn’t melting smoothly, it could be due to a few reasons:
- High Heat: Using too much heat can cause the chocolate to burn. Always melt chocolate slowly on low heat or using a moderate microwave setting.
- Unwanted Moisture: Even a tiny drop of water can cause chocolate to seize. Ensure your melting equipment is fully dry.
To remedy this, you can try adding a small amount of vegetable oil to the chocolate; this can help loosen the mixture and improve the texture.
Chocolate Becomes Gritty
A gritty texture in melted chocolate often results from overheating or improper melting. Understanding the Maillard reaction, which can cause chocolate to become gritty, is essential:
- Manage Temperature: Ensure you’re heating the chocolate gently and consistently; if the chocolate looks clumpy or granular, that may be a signal of overheating.
- Rescue Gritty Chocolate: If you’ve already heated it too much, you can add a small amount of cocoa butter or vegetable oil to help restore the smooth texture.
Recipes for Chocolate Dipping
Recipe 1: Classic Chocolate Fondue
Ingredients
- 8 oz. dark chocolate
- 1 cup heavy cream
- Optional dippers: fruits, marshmallows, pretzels, etc.
Directions
- Break chocolate into small pieces for even melting.
- In a saucepan, heat the cream until it begins to simmer.
- Pour the hot cream over the chocolate in a bowl and let it sit for a minute.
- Stir the mixture until the chocolate is completely melted and smooth.
- Serve warm with your preferred dippers.
Recipe 2: White Chocolate Dip
Ingredients
- 8 oz. white chocolate
- ½ cup coconut oil
Directions
- Melt the white chocolate and coconut oil together using your preferred melting method.
- Stir until smooth and fully combined.
- Serve with an assortment of fruits or cookies for dipping.
Recipe 3: Milk Chocolate Bark for Dipping
Ingredients
- 12 oz. milk chocolate
- 2 cups chopped nuts and dried fruits.
Directions
- Melt the milk chocolate using your chosen method until smooth.
- Mix in chopped nuts and dried fruits until well combined.
- Pour the mixture onto a parchment-lined baking sheet and spread evenly.
- Allow to cool and set before breaking into pieces for dipping.
Serving Suggestions and Pairings
When it comes to serving melted chocolate for dipping, various dippers can enhance your experience. Here are some favorites:
- Fruits such as strawberries, bananas, and apple slices.
- Marshmallows and pretzels for a savory-sweet contrast.
- Cookies and biscuits that add texture and crunch.
For beverage pairings, consider serving with a rich red wine, a creamy hot chocolate, or even a refreshing iced coffee to complement the sweetness of your chocolate dips.
FAQs
What is the best way to melt chocolate for dipping?
The best way to melt chocolate depends on personal preference, but the three most common methods are using a double boiler, microwave, or chocolate melting pot. Each method has benefits and can be chosen based on the volume of chocolate and convenience required.
Can I use chocolate chips for melting?
While chocolate chips are convenient, they are formulated to retain their shape during baking, so they may not melt as smoothly as other types of chocolate. For better results, consider using bar chocolate or couverture chocolate specifically designed for melting.
How do I thin melted chocolate for dipping?
To thin melted chocolate for dipping, you can add fats such as coconut oil or vegetable shortening. Start with a teaspoon at a time, mixing thoroughly until you achieve your desired consistency.
How long can melted chocolate be stored?
Melted chocolate can be stored in an airtight container in the refrigerator for about 2 weeks. To regain a smooth consistency, gently reheat in the microwave or double boiler when ready to use.
What should I do if my chocolate seizes?
If your chocolate seizes, you can attempt to rescue it by adding a small amount of vegetable oil or cocoa butter. Stir it in thoroughly, ensuring the mixture becomes smooth again. If it remains clumpy, it’s best used for baking rather than dipping.
Conclusion
Melting chocolate for dipping can be a delightful experience when done correctly. By understanding the different types of chocolate, choosing the right melting method, and utilizing helpful tips, you can create beautifully melted chocolate perfect for all kinds of dippers. So gather your ingredients, pick your favorite method, and enjoy the rich indulgence of chocolate dipping.
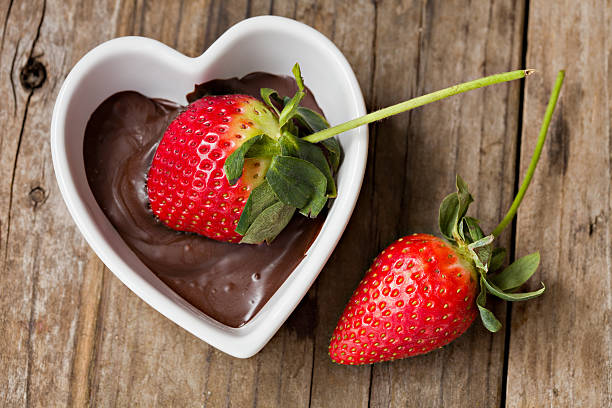
melting chocolate for dipping
Equipment
- 1 double boiler or microwave-safe bowl
- 1 heatproof spatula
- 1 serving bowl
- 1 measuring cups and spoons
Ingredients
- 8 ounces semi-sweet chocolate Chocolate chips or a chocolate bar.
- 1 tablespoon coconut oil Optional, for extra creaminess.
Instructions
- Prepare your melting method: If you’re using a double boiler, fill the bottom pot with water and bring it to a simmer. If using a microwave, place the chocolate in a microwave-safe bowl.
- If using a double boiler, place the chocolate in the top pot of the double boiler. Stir occasionally as it melts. If using a microwave, heat the chocolate in 30-second intervals, stirring well after each interval until completely melted.
- Once melted, if you prefer a thinner consistency, stir in the coconut oil gradually until the desired smoothness is achieved.
- Remove the chocolate from the heat source and pour it into a serving bowl to make dipping easier.
- Serve immediately with your favorite dippables, such as strawberries, bananas, marshmallows, or pretzel rods.
- Make sure not to get any water into the chocolate while melting; moisture can cause the chocolate to seize.
- If you have leftovers, store the melted chocolate in an airtight container in the refrigerator. You can reheat gently when ready to use again.
- Experiment with adding flavors like vanilla extract or sea salt for a unique touch.


